
CALL NOW
(281) 367-4660

The luxury pool design-to-build process is one of the biggest questions homeowners have before starting a custom pool project. Most homeowners want to know three things right away: how long it will take, what actually happens during construction, and how permitting or HOA approval affects the timeline.
Those are fair questions.
Building a custom luxury pool is a major investment. It affects your backyard, your home, your schedule, your budget, and your expectations. Therefore, you should understand the process before you begin.
At Texas Pools Inc., we have helped homeowners across Houston, The Woodlands, Spring, Cypress, Bridgeland, Magnolia, Lake Conroe, Memorial, River Oaks, Benders Landing, Woodson’s Reserve, Spring Trails, and surrounding Texas communities design and build custom pools for more than 45 years. As a high-end custom luxury pool builder, winner of more than 300 pool design awards, and a Certified Master Pool Builder, we believe homeowners should feel educated before they build.
This explains the full d process for a luxury pool, including realistic timelines, construction stages, permitting, HOA approval, and the factors that can speed up or slow down your project.
Before you spend six figures on a pool, it helps to understand what matters most.
👉Related Link: Custom Luxury Pool Builder
For many custom luxury pool projects in Texas, the full process from design consultation to swim-ready completion may take three to six months or more, depending on the complexity of the design, permitting, HOA approval, weather, access, site conditions, and construction scope.
However, the actual construction phase is only one part of the timeline.
A more realistic way to think about the process is this:
Some projects move faster. Others take longer.
A simple custom pool with clear access, no major drainage issues, fast approvals, and few changes may move more quickly. However, a luxury backyard project with a pool, spa, outdoor kitchen, fire features, water features, drainage solutions, premium decking, landscaping, and HOA review may take longer.
The most important thing to understand is this:
A well-designed pool is not just dug and filled. It is planned, engineered, approved, built, inspected, finished, and started up correctly.
That process takes time.
One of the reasons pool timelines feel confusing is that not all pool projects are the same.
A basic pool and a luxury outdoor living project may both be called “pool construction,” but they are very different in scope.
A straightforward custom pool may include excavation, plumbing, steel, gunite, tile, coping, equipment, decking, plaster, and startup.
A luxury design may also include:
As a result, a luxury pool timeline depends on more than the pool shell.
It depends on the entire backyard vision.
That is why homeowners should be cautious when they hear a simple answer like, “We can build it in eight weeks.”
Maybe that is true for some projects. However, it may not include design, engineering, permitting, HOA approval, weather delays, change orders, material selections, inspections, or outdoor living additions.
A better question is not only, “How long does it take to build a pool?”
The better question is:
How long will it take to design, approve, build, finish, and start up the pool we actually want?
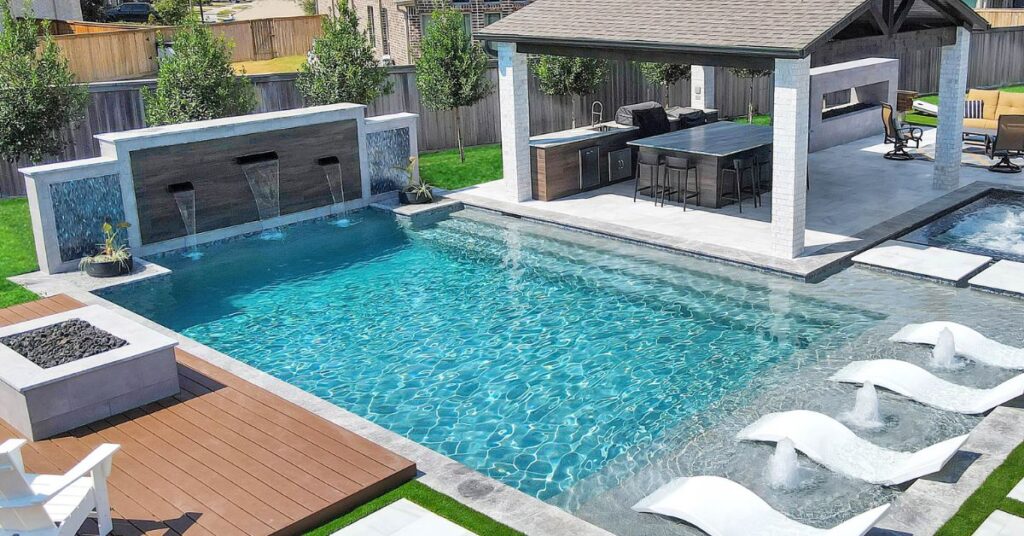
The custom pool process can be broken into several major stages.
While every builder may structure these steps differently, most luxury pool projects follow a similar path:
Each step matters.
Skipping or rushing the early stages can lead to problems later. Therefore, the best pool projects begin with planning and clarity.
The process usually begins with a consultation.
During this conversation, the goal is to understand your vision, property, lifestyle, timeline, and general investment range.
A strong consultation should answer questions like:
This stage is about listening to your dreams and vision– bringing it to life.
It helps determine whether the project goals, budget, timeline, and builder are a good fit and in alignment.
At Texas Pools, this educational step is important because a custom luxury pool should be built around the way you live.
👉 Related Content: Luxury Pool Styles in Texas: How to Find Your Backyard Fit
The next step is understanding the backyard.
A pool does not exist in isolation. It must work with the home, yard, drainage, access, utilities, setbacks, easements, trees, slope, soil, and outdoor living areas.
A site evaluation may consider:
This step is especially important in the Houston area because drainage, clay soil, heavy rain, and backyard access can all affect the design and construction plan.
A pool may fit on paper, but that does not always mean it works well in the yard.
Therefore, the design process should consider how the pool will actually function in the space.
👉 Related Link: Talk to Our Design/Construction Experts
Design discovery is where the project becomes personal.
This stage focuses on how you want the backyard to feel and function.
For example, some homeowners want a peaceful retreat. Others want a family pool. Some want a resort-style space for entertaining. Others want a modern architectural design that feels connected to the home.
Important design questions include:
This stage helps prevent one of the biggest mistakes homeowners make: choosing features before defining the purpose of the backyard.
Luxury pool design should not be a random list of upgrades.
It should be intentional and well thought out.
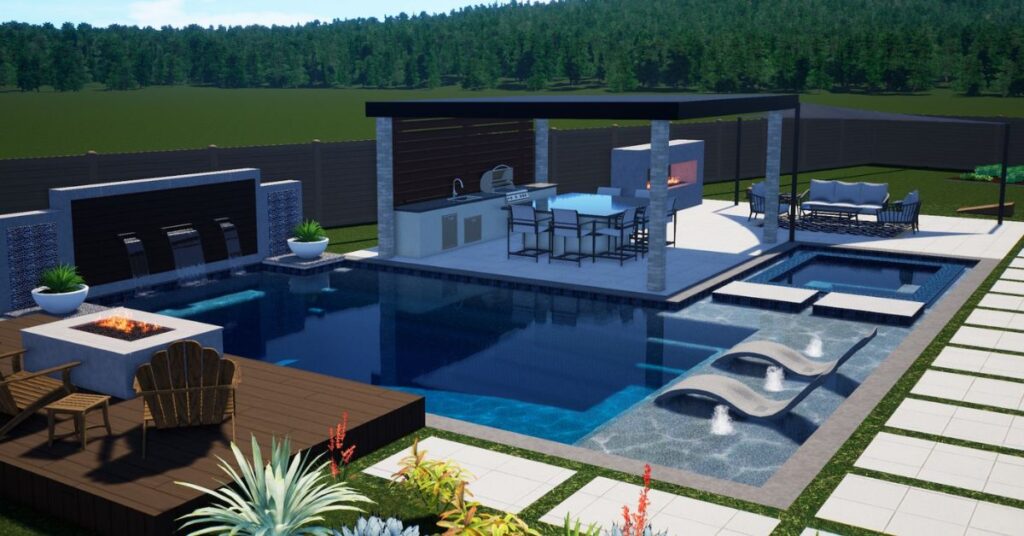
Once the goals, site conditions, and lifestyle needs are clear, the design team can begin creating a pool concept.
A conceptual design may include:
This stage helps homeowners see how the backyard could come together.
It also reveals important tradeoffs.
For example, a larger tanning ledge may reduce swim space. A slide may require more room and deeper water. Fire bowls may create visual impact but require gas planning. A spa may improve year-round use but increase cost.
Because of this, conceptual design is not just about appearance.
It is about making better decisions.
Budget alignment is one of the most important parts of the design-to-build process.
A luxury pool can change significantly based on design choices, materials, site conditions, and outdoor living features.
Cost drivers may include:
This is why budget should be discussed before the design gets too far.
If a homeowner wants a full outdoor living project but has only budgeted for a simple pool, expectations need to be adjusted early.
Similarly, if the budget supports a larger project, the design team can help prioritize which features will create the most long-term value.
The goal is not to overspend.
The goal is to design with clarity.
Related Blog : How Much Does a Custom Gunite Pool Cost in Texas in 2026?
After the first concept is reviewed, revisions may be needed.
This is normal.
Homeowners may adjust pool size, change the spa shape, revise the decking, remove or add features, or refine the overall layout.
Material selections may also begin during this stage.
These can include:
Selections affect both the look and the investment.
For example, premium stone, upgraded tile, custom water features, or high-end interior finishes can elevate the design. However, they can also affect cost and lead time.
Therefore, this stage should be handled carefully.
The more decisions that are made before construction begins, the smoother the build can be.
Once the design is approved, the project may move into engineering and construction documentation.
This step prepares the design for permitting, HOA submission, and construction.
Depending on the project, documents may include:
Engineering is especially important for custom gunite pools, complex designs, raised walls, spas, retaining walls, and challenging soil conditions.
This is also where local codes, setbacks, easements, and safety requirements must be addressed.
A beautiful design still has to be buildable, compliant, and properly documented.
Pool permitting is the process of getting approval from the local city, county, or authority before construction begins.
The exact process depends on where the home is located.
For example, permitting requirements may vary between Houston, The Woodlands, Spring, Cypress, Magnolia, Lake Conroe, and other surrounding areas.
Generally, pool permitting may involve submitting documents such as:
The permitting office reviews the project to make sure it follows applicable codes and requirements.
Once the permit is approved, construction can move forward.
Pool permitting may take one to four weeks in some areas. However, it can take longer depending on the municipality, project complexity, backlog, revisions, inspections, or missing information.
More complex projects may require additional review.
For example, a project with drainage concerns, easements, retaining walls, outdoor structures, gas features, or unusual site conditions may take longer than a straightforward pool.
Because permitting timelines are outside the builder’s full control, homeowners should allow flexibility.
A good builder can prepare thorough documents and respond quickly to review comments. However, the approval timeline ultimately depends on the reviewing authority.
If your neighborhood has a homeowners association, HOA approval may be required before construction begins.
This is common in many master-planned and high-end communities throughout Greater Houston, The Woodlands, Bridgeland, Cypress, Magnolia, Benders Landing, Woodson’s Reserve, Spring Trails, and similar areas.
HOA approval is separate from city or county permitting.
That means even if the city approves the project, the HOA may still need to approve the design.
An HOA may review:
Some HOAs have very clear requirements. Others may require committee review or board approval.
HOA approval may take two to six weeks for many communities. However, some HOAs may move faster, while others may take longer.
The timeline may depend on:
In some communities, the HOA may only review submissions at scheduled meetings. Therefore, missing a deadline can delay approval by several weeks.
This is why homeowners should identify HOA requirements early.
In many cases, HOA approval and permitting may be prepared around the same general time. However, the right order depends on the municipality, HOA rules, and project.
Some HOAs want to review the design before permitting. Some permitting authorities may not care about HOA approval. However, starting construction without HOA approval can create serious problems.
Therefore, homeowners should not assume HOA approval is automatic.
It is a critical step in the process.
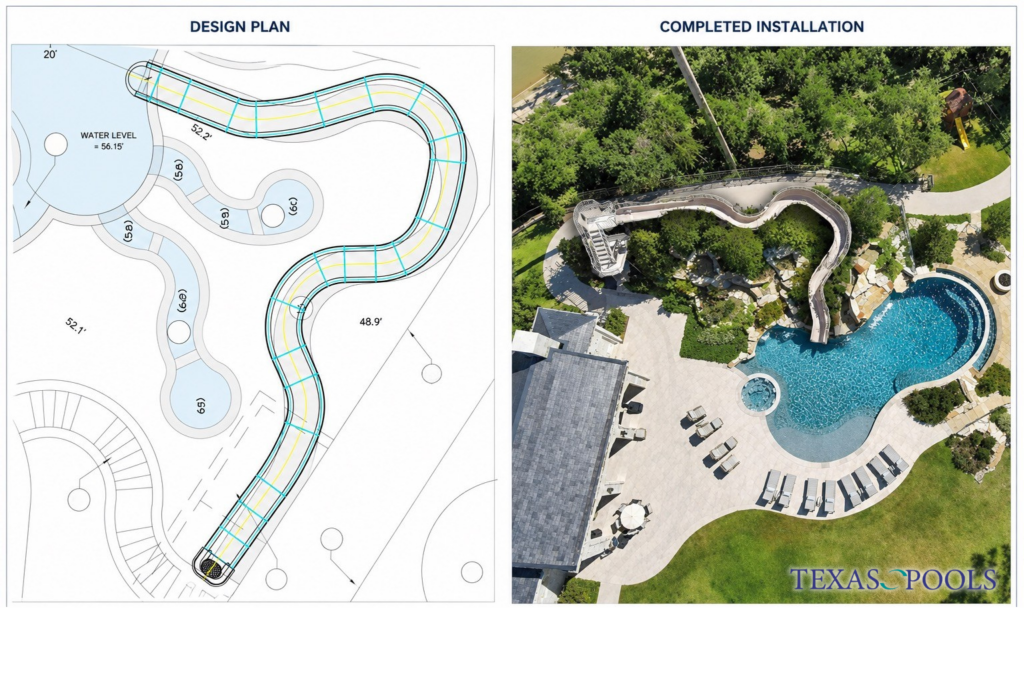
Before excavation begins, there is usually a pre-construction phase.
This stage may include:
This step helps reduce confusion once crews arrive.
It is also the time to confirm important practical details, such as where equipment will be placed, how crews will access the backyard, what areas need protection, and how construction communication will work.
This stage matters because pool construction is disruptive.
A clear pre-construction plan helps homeowners understand what to expect.
Once approvals are in place and construction begins, the pool moves through several major phases.
Every project is different, but most custom gunite pool construction follows this general sequence.
The pool layout is marked in the yard based on the approved design.
This gives homeowners a real-world view of the pool shape and placement before digging begins.
Once layout is confirmed, excavation starts.
Excavation is when the pool hole is dug. This is one of the most dramatic stages because the backyard changes quickly.
However, excavation can also reveal site conditions that were not fully visible before digging.
Examples include:
In Texas, soil and drainage considerations can be especially important.
A strong builder will know how to respond if site conditions require adjustments.
After excavation, plumbing and steel are installed.
Plumbing creates the circulation system that moves water through the pool, spa, drains, returns, water features, and equipment.
Steel reinforcement creates the structural framework for the gunite shell.
This stage is critical because much of the pool’s long-term performance depends on what happens before the shell is applied.
Homeowners may see pipes, steel grids, and forms throughout the excavated pool.
Although it may look messy at this stage, these systems are essential.
Gunite is a concrete material pneumatically applied over the steel framework.
This creates the pool shell.
For custom luxury pools, gunite allows significant design flexibility. It can be shaped into custom forms, benches, steps, spas, tanning ledges, curves, geometric layouts, and deeper or shallower areas.
Once gunite is applied, the shell needs time to cure.
Curing is important because it supports strength and durability.
During this stage, homeowners may need to water the shell as directed by the builder. The builder will explain any care instructions.
Gunite is one of the most important milestones in the construction process because the pool begins to feel real.
After the shell is complete, the pool begins to take on its finished appearance.
This stage may include:
The quality of materials and craftsmanship becomes more visible during this stage.
For luxury pools, details matter.
Tile lines, coping edges, spillover details, stone selection, and feature alignment can all affect the final look.
This is one reason experienced custom pool builders spend so much time on design and selections before construction.
Decking and outdoor living work may happen after major pool structure work, although sequencing can vary by project.
This stage may include:
For many luxury projects, the pool is only one part of the backyard.
The outdoor living areas are what make the space usable.
A pool without enough decking, shade, seating, or flow may feel incomplete. Therefore, decking and outdoor living should be planned as part of the total design, not as an afterthought.
👉 Related Link: Outdoor Living
Pool equipment is installed to operate the pool.
This may include:
Equipment placement matters.
It should be accessible for service but located thoughtfully for noise, visibility, and convenience.
For luxury pools, automation is often included so homeowners can control lights, spa, temperature, and features more easily.
The interior finish is one of the final major construction steps.
This finish affects the look, feel, color, and texture of the pool water.
Interior finish options vary, but they may include plaster, quartz, pebble, or other premium finishes.
Once the finish is applied, the pool is filled with water.
This stage is exciting because the project finally begins to look like the finished pool.
However, startup and water chemistry still matter.
After the pool is filled, the startup process begins.
This includes starting equipment, balancing water chemistry, brushing the surface, checking systems, and making sure everything is functioning properly.
The first days and weeks after startup are important.
The builder may provide care instructions for the new surface and equipment.
Homeowners should follow these instructions carefully because proper startup helps protect the pool finish and long-term performance.
The final walkthrough helps homeowners understand how to use and care for the pool.
This may include:
This step is important because a luxury pool includes systems, equipment, and features that homeowners need to understand.
A good builder should not simply finish construction and disappear.
Homeowners should feel prepared to enjoy and maintain their new pool.
Even with strong planning, pool projects can experience delays.
Common delay factors include:
In Texas, weather can be a major factor. Heavy rain may delay excavation, gunite, decking, or other construction phases.
HOA and permit timelines can also vary widely.
Additionally, homeowner decisions can affect the schedule. If tile, coping, decking, or finish selections are delayed, construction may slow down.
Therefore, one of the best ways to protect your timeline is to make decisions early and avoid major changes once construction begins.
While no builder can control every factor, homeowners can help keep the process moving.
Here are several practical steps:
The more decisions made before construction, the fewer delays later.
If your neighborhood has an HOA, gather guidelines early.
Luxury custom work takes time. Planning for a realistic timeline reduces frustration.
Changes made after construction begins can affect schedule and cost.
Tile, coping, decking, and finish selections should be made before they are needed.
A clear communication rhythm helps everyone stay aligned.
Experienced builders understand permitting, construction sequencing, site conditions, and local challenges.
Some homeowners want to move quickly into construction.
That is understandable. Once you decide to build a pool, you want to enjoy it as soon as possible.
However, rushing design can create problems.
The design phase is where important decisions are made:
If those decisions are rushed, the construction phase may suffer.
A well-planned design can help reduce change orders, confusion, and budget surprises.
It can also create a better final result.
In luxury pool construction, speed is not the only goal.
The goal is a pool that is beautiful, functional, well-built, and right for the home.
At Texas Pools, we believe homeowners make better decisions when they understand the process.
That is the purpose of Pool School.
We help homeowners understand budget, design, construction, ownership, and Texas-specific pool considerations before they build.
Our process is built around education, transparency, and custom design.
We are not here to push a one-size-fits-all pool.
Instead, we help homeowners think through what is possible, what matters most, and what decisions need to be made before construction begins.
With more than 45 years of experience, more than 300 pool design awards, and the Certified Master Pool Builder designation, Texas Pools brings deep experience to custom luxury pool projects across Greater Houston and surrounding communities.
That experience matters because luxury pool construction is not just about digging a hole and filling it with water.
It is about design, engineering, approvals, construction sequencing, craftsmanship, and long-term performance.
While every project is different, here is a general timeline homeowners can use for planning.
This includes early conversations, site information, goals, and budget discussion.
This includes conceptual design, feedback, revisions, and budget alignment.
This includes material selections, engineering, and final documentation.
This depends on the neighborhood, review committee, and submission requirements.
This depends on the municipality, project complexity, and review backlog.
This includes excavation, plumbing, steel, gunite, tile, coping, decking, equipment, finish, startup, and walkthrough.
Projects with outdoor kitchens, patio structures, retaining walls, complex drainage, premium features, or extensive landscaping may take longer.
Again, these are general ranges.
The actual timeline should be discussed during the design and pre-construction process.
Before hiring a pool builder or approving a design, ask these questions:
These questions help homeowners understand the process and avoid surprises.
They also help reveal how organized and transparent a builder is.
So, how long does it take to build a luxury pool?
In many cases, homeowners should plan for a full process that may take several months from design to completion. The construction phase itself may take 8 to 16+ weeks for many custom pools, while design, HOA approval, permitting, selections, and planning can add additional time.
What is the construction process?
It typically includes design, approvals, excavation, plumbing, steel, gunite, tile, coping, decking, equipment, interior finish, startup, and final orientation.
How does permitting and HOA approval work?
Permitting is handled through the local authority. HOA approval is handled through your community or architectural review committee. Both can affect the timeline, and both should be discussed early.
The most important takeaway is this:
A luxury pool should not be rushed without clarity.
The best projects are planned carefully, approved properly, built professionally, and finished with attention to detail.
At Texas Pools, we believe education creates better outcomes. Before you spend six figures on a pool, we’ll help you understand what matters most.
If you are considering a custom luxury pool in Houston, The Woodlands, Spring, Cypress, Bridgeland, Magnolia, Lake Conroe, Memorial, River Oaks, Benders Landing, Woodson’s Reserve, Spring Trails, or surrounding Texas communities, Pool School is a great place to start.
We teach first.
Luxury follows.
👉Related Link: Schedule a Consultation
©2026 Texas Pools. All Rights Reserved | Privacy Policy | Terms and Conditions | Site Map

By submitting your phone number, you agree to receive marketing text messages from Texas Pools. Message frequency varies. Message and data rates may apply. Text HELP for Support. Text STOP to opt-out. View our Terms of Service and Privacy Policy.
By submitting your phone number, you agree to receive marketing text messages from Texas Pools. Message frequency varies. Message and data rates may apply. Text HELP for Support. Text STOP to opt-out. View our Terms of Service and Privacy Policy.
By submitting your phone number, you agree to receive marketing text messages from Texas Pools. Message frequency varies. Message and data rates may apply. Text HELP for Support. Text STOP to opt-out. View our Terms of Service and Privacy Policy.
By submitting your phone number, you agree to receive marketing text messages from Texas Pools. Message frequency varies. Message and data rates may apply. Text HELP for Support. Text STOP to opt-out. View our Terms of Service and Privacy Policy.
By submitting your phone number, you agree to receive marketing text messages from Texas Pools. Message frequency varies. Message and data rates may apply. Text HELP for Support. Text STOP to opt-out. View our Terms of Service and Privacy Policy.
By submitting your phone number, you agree to receive marketing text messages from Texas Pools. Message frequency varies. Message and data rates may apply. Text HELP for Support. Text STOP to opt-out. View our Terms of Service and Privacy Policy.
By submitting your phone number, you agree to receive marketing text messages from Texas Pools. Message frequency varies. Message and data rates may apply. Text HELP for Support. Text STOP to opt-out. View our Terms of Service and Privacy Policy.
By submitting your phone number, you agree to receive marketing text messages from Texas Pools. Message frequency varies. Message and data rates may apply. Text HELP for Support. Text STOP to opt-out. View our Terms of Service and Privacy Policy.
By submitting your phone number, you agree to receive marketing text messages from Texas Pools. Message frequency varies. Message and data rates may apply. Text HELP for Support. Text STOP to opt-out. View our Terms of Service and Privacy Policy.
By submitting your phone number, you agree to receive marketing text messages from Texas Pools. Message frequency varies. Message and data rates may apply. Text HELP for Support. Text STOP to opt-out. View our Terms of Service and Privacy Policy.
By submitting your phone number, you agree to receive marketing text messages from Texas Pools. Message frequency varies. Message and data rates may apply. Text HELP for Support. Text STOP to opt-out. View our Terms of Service and Privacy Policy.
By submitting your phone number, you agree to receive marketing text messages from Texas Pools. Message frequency varies. Message and data rates may apply. Text HELP for Support. Text STOP to opt-out. View our Terms of Service and Privacy Policy.
By submitting your phone number, you agree to receive marketing text messages from Texas Pools. Message frequency varies. Message and data rates may apply. Text HELP for Support. Text STOP to opt-out. View our Terms of Service and Privacy Policy.
By submitting your phone number, you agree to receive marketing text messages from Texas Pools. Message frequency varies. Message and data rates may apply. Text HELP for Support. Text STOP to opt-out. View our Terms of Service and Privacy Policy.
By submitting your phone number, you agree to receive marketing text messages from Texas Pools. Message frequency varies. Message and data rates may apply. Text HELP for Support. Text STOP to opt-out. View our Terms of Service and Privacy Policy.
By submitting your phone number, you agree to receive marketing text messages from Texas Pools. Message frequency varies. Message and data rates may apply. Text HELP for Support. Text STOP to opt-out. View our Terms of Service and Privacy Policy.